
This is the final result of our Work :)
!KEEP ALL LAYERS SEPARATE AS EACH LAYER EFFECTS WILL VARY!
If you Enjoy this Tutorial Please leave a comment and share this with others!
Create an Angel in Photoshop Link
If you Enjoy this Tutorial Please leave a comment and share this with others!
Create an Angel in Photoshop Link

Start Here
I used this image I found while browsing Google images for the keyword jump. Click here for the Image
Open the image in Photoshop and keep the image size the same for now.
 |
| Step 1. Begin using the Magnetic Lasso tool to outline the jumper. It doesn't have to be perfect, but try not to chop off any limbs, fingers or toes! |
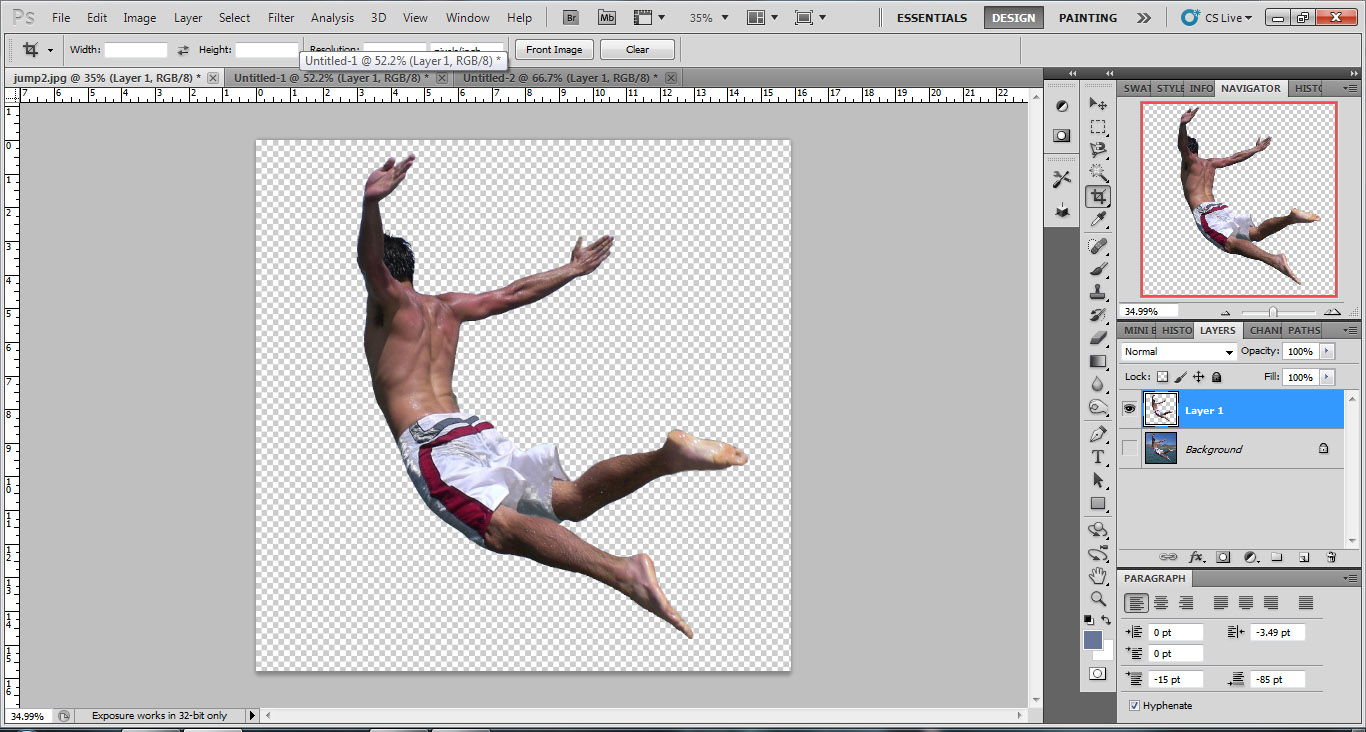 |
| Step 2. Once Selected Copy and Paste the Jumper in a new layer and try to clean up the edges to the best of your ability. |
 |
| Step 3. You will notice that it would take a lot of patience to remove all the blue from the hair and remaining areas around his body. So we are going to go to the top menu to SELECT then COLOR RANGE. |
 |
| Step 4. Use the color picker to select the blue color range between the hair. You will notice in the black color range box that there are little specks of white. This white is the blue that you selected in the image. |
 |
| Step 5. Once you Select OK you will notice that all the remaining blue is now selected. Hit the Delete Key and Your image will appear clean and cut! |
 |
Step 6. Increase the Canvas Size of the Image by 10 inches, this way the wings will not get cut off when we add them. |
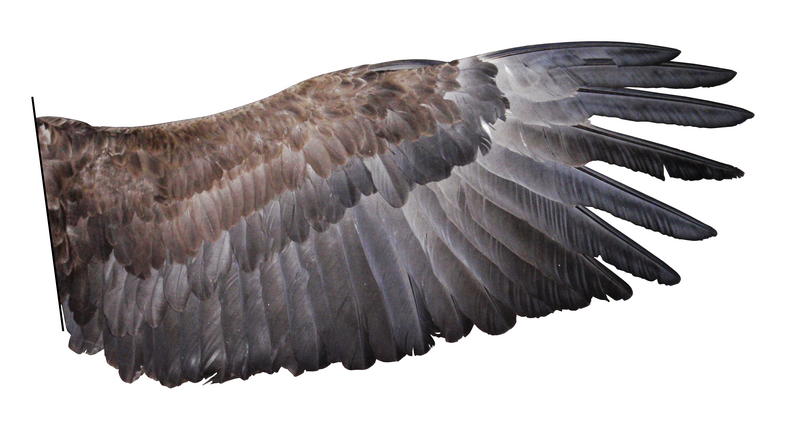
Wings!
OK so we have our diver jumper man all cut out and cleaned up, now comes the fun part! Lets get the wings set up. I got the wings from searching wing or wings in Google images.
 |
Step 1. Use the Magic Selection tool to remove the white background. Then copy the layer to your Jumper file.  |
 |
| This is what the second Wing should look like after playing with Distort and Perspective Tools |
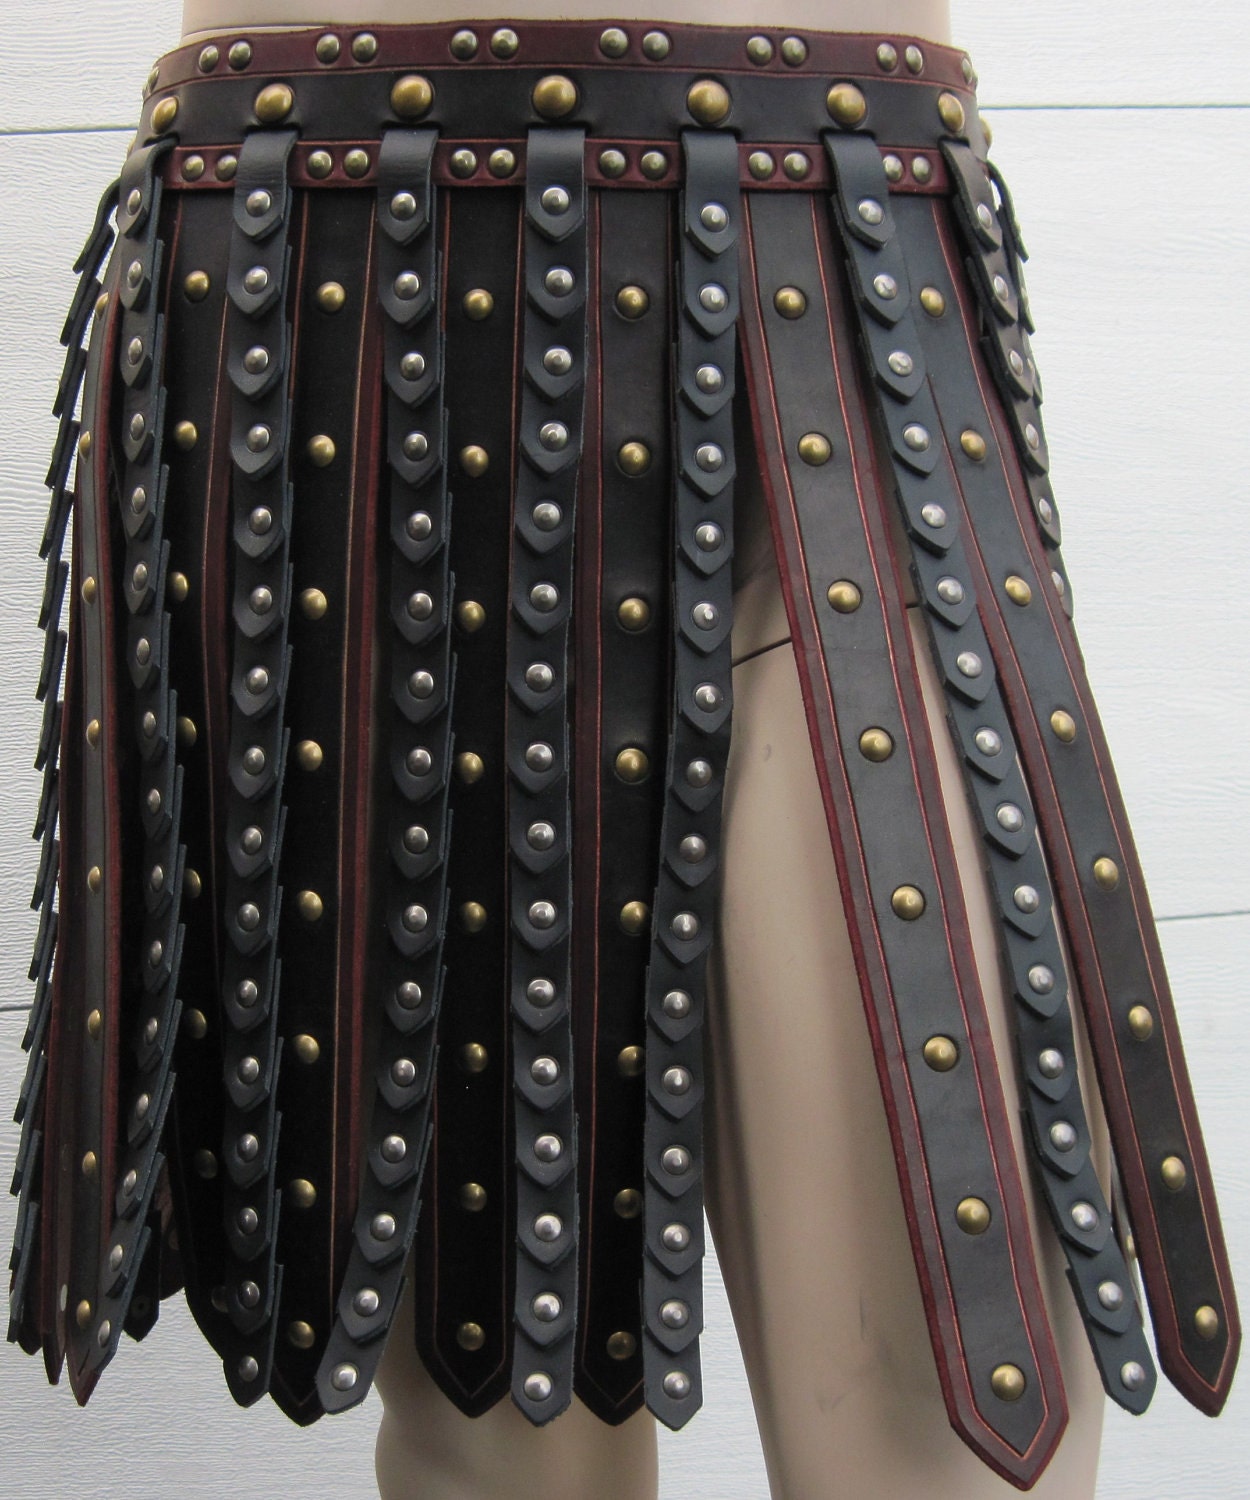
Leather Skirt
So now we have a Pretty cool looking angel in a bathing suit... Lets try and fix this and add something a bit more medieval? or Angel like rather than a wet bathing suit. Here is a Link to a Leather Skirt I found online through Google images
 |
| Step 1. Do your best to Remove all of the background from the skirt. Then move the layer into your Diver/Jumper file |
 |
| Step 2. Scale the Skirt by lining up the waist area appropriately |
 |
| Step 3. Play with the perspective and use the warp tool to wrap around the waist area of the figure. |


