This is the final result of our Work :)
!KEEP ALL LAYERS SEPARATE AS EACH LAYER EFFECTS WILL VARY!
If you Enjoy this Tutorial Please leave a comment and share this with others!
Create an Angel in Photoshop Link
If you Enjoy this Tutorial Please leave a comment and share this with others!
Create an Angel in Photoshop Link
Start Here
I used this image I found while browsing Google images for the keyword jump. Click here for the Image
Open the image in Photoshop and keep the image size the same for now.
 |
| Step 1. Begin using the Magnetic Lasso tool to outline the jumper. It doesn't have to be perfect, but try not to chop off any limbs, fingers or toes! |
 |
| Step 2. Once Selected Copy and Paste the Jumper in a new layer and try to clean up the edges to the best of your ability. |
 |
| Step 5. Once you Select OK you will notice that all the remaining blue is now selected. Hit the Delete Key and Your image will appear clean and cut! |
Wings!
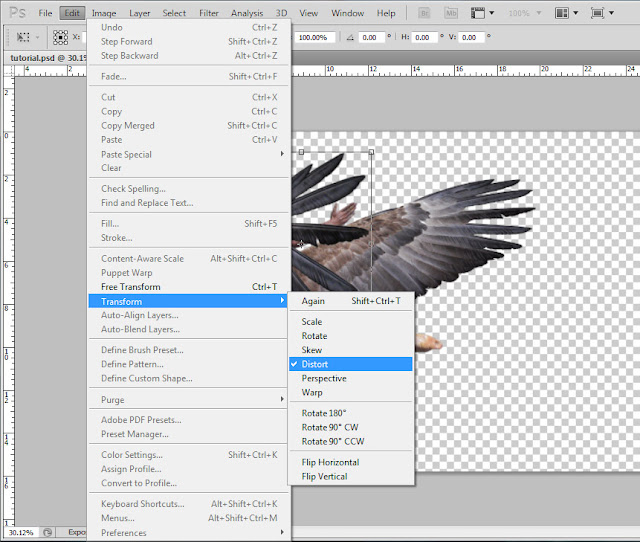
OK so we have our diver jumper man all cut out and cleaned up, now comes the fun part! Lets get the wings set up. I got the wings from searching wing or wings in Google images.
 |
| This is what the second Wing should look like after playing with Distort and Perspective Tools |
Leather Skirt
So now we have a Pretty cool looking angel in a bathing suit... Lets try and fix this and add something a bit more medieval? or Angel like rather than a wet bathing suit. Here is a Link to a Leather Skirt I found online through Google images
 |
| Step 1. Do your best to Remove all of the background from the skirt. Then move the layer into your Diver/Jumper file |
 |
| Step 2. Scale the Skirt by lining up the waist area appropriately |
 |
| Step 3. Play with the perspective and use the warp tool to wrap around the waist area of the figure. |
Layer and Lighting Effects
Now we are going to bring the layers together by incorporating a few tweaks in the layers.
Wings and Figure -
Adjust the levels = Input should read 0 , 0.47 , 164
Vibrance should be -60
Skirt -
adjust the curves - Output should be 28 and input 67
This should be your result :
You may want to add some more shadows using the paintbrush tool or burn tool to give the Angel more depth. I burn the skin near the wings to look like they are part of his body. I also add shading near the skirt so the wings give off a shadow. Play around and have fun with it.
 |
| Create a Gradient Map in a new Layer and Set the Layer Style to Overlay at 75% Opacity |
Hope you Enjoyed this tutorial! Pass it along and give www.Bri-Idea.com - Long Island Web Design / Graphic Design a shout!


neat work! PSDs are fun thing to do.
ReplyDeleteboston web design company
very cool
ReplyDelete